
Key Takeaways
- Oyster mushrooms are a versatile and nutritious choice for urban cultivation, thriving in small spaces with minimal equipment.
- Selecting the right oyster mushroom species is crucial for successful growth in an urban environment.
- Creating the right substrate is key; sawdust and straw are common choices for oyster mushroom cultivation.
- Maintaining proper humidity, temperature, and air circulation is essential for healthy mushroom growth.
- Harvesting at the right time ensures the best flavor and texture of your oyster mushrooms.
Getting Started with Urban Oyster Mushroom Cultivation
Urban oyster mushroom cultivation is an innovative way to grow your own food, even if you’re tight on space. These delightful fungi are not only a culinary treat but also packed with nutrients. Let’s embark on a journey to grow oyster mushrooms right where you are, transforming your urban dwelling into a lush mushroom garden.
Selecting the Right Species for Your Urban Space
Not all oyster mushrooms are created equal, especially when it comes to growing them in an urban environment. You’ll want to choose a species that matches your climate and space. For instance, the blue oyster mushroom is perfect for cooler temperatures, while the pink oyster thrives in warmth. Consider the following when selecting your species:
- Local climate compatibility
- Space available for cultivation
- Your personal taste preference
Understanding the Life Cycle of Oyster Mushrooms
Before diving in, it’s important to understand the life cycle of these fungi. Oyster mushrooms start as spores, which grow into mycelium, the vegetative part of the fungus. Given the right conditions, the mycelium will produce fruiting bodies – the mushrooms we eat. This knowledge will guide your cultivation process from start to finish.
Setting Up Your Cultivation Space
Now, let’s talk about where your mushrooms will live. You don’t need a sprawling garden – a small balcony, kitchen corner, or even a closet can be your mushroom haven. The key is to control the environment to mimic the natural habitat of oyster mushrooms.
Choosing Containers and Creating Microclimates
Containers for growing mushrooms can range from plastic bags to wooden boxes. Whatever you choose, ensure there’s enough room for growth and some ventilation. Here’s a simple way to create a microclimate:
- Line your container with a plastic bag.
- Add your substrate and inoculate with spawn.
- Cover with another bag, poking a few holes for air exchange.
Remember, the goal is to keep the humidity high and the temperature stable – just like the forest floor where mushrooms naturally grow.
Substrate Selection: Sawdust, Straw, or Something Else?
The substrate is like soil for mushrooms; it’s where they get their nutrients. Oyster mushrooms aren’t picky, but they do have favorites. Sawdust from hardwoods or straw works wonders and is easily accessible. Just make sure whatever you use is free from contaminants – pasteurization is your friend here.
Stay tuned for the next steps, where we’ll dive into the inoculation process and how to maintain the perfect growing conditions for your urban oyster mushrooms.
Maintaining Proper Humidity and Temperature
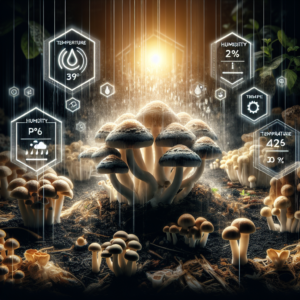
For oyster mushrooms to flourish, they require a humid environment, typically between 60-70% humidity. Temperature is equally critical, with most oyster mushrooms preferring a range of 65-75°F. You can maintain humidity by misting the substrate regularly, but avoid soaking it. Keep a thermometer and humidity gauge handy to monitor the conditions closely.
Lighting: How Much Does It Really Matter?
While mushrooms don’t require light for photosynthesis like plants do, they do need some light to trigger fruiting. Indirect sunlight or a few hours under a fluorescent light will suffice. Just remember, mushrooms are like us when it comes to sunbathing – a little is fine, but too much isn’t a good thing.
Air Circulation: Keeping Your Mushrooms Happy
Fresh air exchange is vital for oyster mushroom health. It helps to prevent the buildup of carbon dioxide which can stifle mushroom growth and encourage contaminants. A simple fan on a low setting, placed strategically, can provide the gentle air movement your mushrooms need to thrive.
Harvesting Your Oyster Mushrooms
Harvesting is the most rewarding part of the cultivation process. When the edges of the mushroom caps are still slightly curled downwards, it’s a sign they’re ready for harvest. This is usually about 5-7 days after the mushrooms begin to form. Use a sharp knife to cut the mushrooms at the base, being careful not to disturb the substrate too much.
When to Harvest: Recognizing the Signs
Harvest time can vary depending on the species and growing conditions. Besides the curled edges, look for a fully formed cap and a slight firmness to the touch. Harvesting too early or too late can affect both the taste and texture of the mushrooms.
Harvesting Techniques for a Clean Crop
A clean harvest means less work later when it’s time to eat your mushrooms. Cut the mushrooms at the base with a knife or twist them off gently. Be sure to harvest all mature mushrooms at the same time to encourage a more uniform second flush.
Maximizing Your Mushroom Yield
Getting the most out of your mushroom crop means understanding and encouraging the fruiting cycles. After the first harvest, give your mushrooms some time to recover before they start the next flush. Here are a few ways to maximize your yield:
- Ensure the substrate is still moist and add water if necessary.
- Trim away any spent mushroom stumps to prevent mold.
- Consider a light cold shock by briefly reducing the temperature, which can stimulate a new flush.
Understanding the Fruiting Body and Its Cycles
Oyster mushrooms typically have a short resting period between flushes. The first flush is often the largest, with subsequent flushes decreasing in size. By maintaining ideal growing conditions and careful harvesting, you can encourage several flushes from the same substrate.
Tips for Encouraging a Second Flush of Mushrooms
After the first harvest, don’t be too quick to discard your substrate. With a bit of care, you can get several more flushes. Here’s what to do:
- Check the moisture level of the substrate and mist if it’s dry.
- Remove any leftover mushroom debris to prevent mold.
- Continue to provide fresh air and maintain proper humidity and temperature.
Common Pests and Problems
Even in an urban setting, pests and diseases can be a concern. The most common issues are mold and fruit flies, which can be managed with good hygiene and proper air circulation.
Identifying and Addressing Contamination
If you notice any odd colors or smells, you might be dealing with contamination. Mold is often green or black, and it spreads quickly. At the first sign of contamination, remove the affected area to prevent it from spreading. Sanitation is your best preventive measure.
Dealing with Pests: Prevention and Cure
Fruit flies can be a nuisance, but they’re easily managed with traps and by keeping the growing area clean. Regularly inspect your mushrooms and substrate for any signs of pests or diseases, and take action immediately to keep your crop healthy.
By following these guidelines, you’ll be well on your way to producing a bountiful crop of oyster mushrooms right in the heart of the city. With a bit of patience and attention to detail, urban oyster mushroom cultivation can be a rewarding and delicious venture.
Next Steps: Post-Harvest Care and Use
After the excitement of harvesting, it’s time to ensure that your oyster mushrooms are stored correctly to preserve their freshness. Proper post-harvest care also sets the stage for the best culinary experience when it’s time to cook them.
Storing Your Harvest: Best Practices
Oyster mushrooms are best when fresh, but they can also be stored for later use. To keep them fresh, place them in a paper bag and store them in the refrigerator. This method allows the mushrooms to ‘breathe’ and stay dry, preventing spoilage. If you’re not planning to use them within a week, consider drying or freezing them for long-term storage.
From Garden to Table: Preparing Your Oyster Mushrooms for Cooking
Now for the fun part – cooking your homegrown oyster mushrooms. These versatile fungi can be sautéed, grilled, or even used in soups and stews. Before cooking, give them a quick rinse under cold water and pat them dry. Since they’re freshly harvested, they won’t need much cleaning. Then, prepare them according to your favorite recipe and enjoy the fruits of your labor.
FAQs
Got questions? You’re not alone. Here are some frequently asked questions about urban oyster mushroom cultivation:
What Are the Best Oyster Mushroom Varieties to Grow in an Urban Environment?
The best varieties for urban cultivation are those that can adapt to smaller spaces and controlled conditions. Blue oyster mushrooms are a popular choice because they’re cold-tolerant. For warmer climates, the pink oyster mushroom is ideal as it thrives in higher temperatures.
How Often Should I Water My Oyster Mushrooms?
Oyster mushrooms need a moist environment, but not a wet one. Mist your mushrooms once or twice a day to maintain the humidity, but be careful not to overwater. Overly wet conditions can lead to bacterial growth and spoilage.
How Long Does It Take for Oyster Mushrooms to Grow?
From inoculation to harvest, oyster mushrooms typically take about 3-5 weeks to grow. The exact time will depend on the species, growing conditions, and how well you maintain the environment for your mushrooms.
Can I Grow Oyster Mushrooms Indoors Without a Garden Space?
Absolutely! Oyster mushrooms are perfect for indoor cultivation. They don’t need much space and can grow on a variety of substrates. Just make sure you provide them with the right conditions, such as humidity and temperature control.
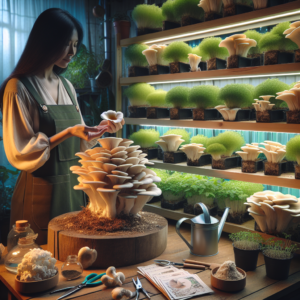
Example: One urban grower converted a bookshelf into a mushroom farm by adding humidity controls and LED lighting. Within weeks, they had a flourishing crop of oyster mushrooms, proving you don’t need a traditional garden space to grow your own food.
Urban oyster mushroom cultivation is a sustainable and rewarding way to grow food in limited spaces. With the right conditions and care, you can enjoy a continuous supply of fresh mushrooms right from your home. So why not start your own urban mushroom farm today?
How Can I Increase the Size of My Oyster Mushroom Fruiting Bodies?
To increase the size of your fruiting bodies, focus on optimizing the growing conditions. Adequate air exchange, proper humidity, and a nutritious substrate are key factors. Sometimes, a slight reduction in temperature after the first flush can also encourage larger mushrooms to develop.