
Eco-friendly Fungi Essentials
Growing oyster mushrooms isn’t just a hobby, it’s a step towards a greener future. These delightful fungi are not only a treat for the taste buds but also champions of sustainability. With the right organic substrate, you can cultivate a bountiful harvest while nurturing the planet. It’s about creating a closed-loop system where waste is minimized, and nature’s gifts are maximized. Let’s embark on a journey to understand how to make this happen.
Key Takeaways
-
Organic oyster mushroom substrates are vital for sustainable farming and environmental health.
-
Diverse substrates like straw, coffee grounds, and sawdust can be used to grow oyster mushrooms organically.
-
Choosing organic substrates supports the growth of healthier mushrooms and a healthier ecosystem.
-
Preparing and maintaining an organic substrate properly can enhance mushroom yield and quality.
-
Understanding the lifecycle and needs of oyster mushrooms is key to successful organic cultivation.
The Magic of Oyster Mushrooms
Oyster mushrooms are not just versatile in the kitchen; they’re a gateway to organic farming. These fungi have the remarkable ability to grow on a variety of organic substrates, breaking down complex materials into simpler, life-sustaining nutrients. It’s a natural process that mirrors the cycle of life and decay in the wild. By harnessing this process, you’re not only growing mushrooms but also contributing to the breakdown of organic waste, which is a cornerstone of sustainable agriculture.
Why Organic is the Way Forward
In a world where industrial farming often takes a toll on our environment, organic oyster mushroom cultivation is a breath of fresh air. It’s a practice that respects the delicate balance of our ecosystems, avoiding synthetic inputs that can harm soil health and biodiversity. By choosing organic, you’re aligning with nature’s rhythms and promoting a farming approach that can be sustained for generations. This isn’t just farming; it’s a commitment to the well-being of our planet.
What Makes a Substrate Organic?
An organic substrate is the foundation of organic oyster mushroom cultivation. It’s the soil-equivalent where your mushrooms will take root, but it’s more than just a growing medium. An organic substrate is free from synthetic chemicals and pesticides, ensuring that your mushrooms are as natural as they can be. It’s about purity and quality, providing your fungi with a clean and nutrient-rich environment to flourish in.
Defining Organic Substrate
When we talk about organic substrates, we’re referring to materials that have been sourced and processed without the use of harmful chemicals. These substrates are typically made from renewable resources like plant waste or recycled organic matter. They are the bedrock of organic mushroom farming, offering a sustainable and eco-friendly alternative to conventional growing mediums that often rely on chemical additives.
Benefits for Mushrooms and the Environment
Choosing organic substrates isn’t just good for your mushrooms; it’s a win for the environment too. These substrates support the growth of fungi without depleting natural resources or polluting the earth. They encourage biodiversity, improve soil structure, and can even help in carbon sequestration. It’s a holistic approach that looks beyond the immediate harvest and considers the long-term health of our environment.
Moreover, by using organic substrates, you’re tapping into the inherent benefits of these materials. They often come packed with natural enzymes and microorganisms that aid in mushroom growth and improve resistance to diseases. It’s a case of nature helping nature, creating a symbiotic relationship between your substrate and your crop.
Choosing Your Organic Substrate
The journey to cultivating oyster mushrooms begins with selecting the right organic substrate. Think of it as choosing a home for your mushrooms – it needs to be comfortable, nurturing, and supportive of growth. The substrate you choose will influence not only the health of your mushrooms but also the flavor and yield of your crop. Let’s explore how to pick a substrate that aligns with your values and your mushrooms’ needs.
Sourcing Materials Sustainably
Before you even begin, consider where your substrate materials are coming from. Sustainable sourcing is key. Look for local, renewable resources that don’t require long transportation, which reduces your carbon footprint. Partner with local coffee shops for grounds, farms for straw, or woodworkers for sawdust. This not only supports your local economy but also ensures that your substrate is as fresh and organic as possible.
Comparing Popular Organic Substrates
There’s a whole world of organic substrates out there, each with its unique benefits. Whether it’s coffee grounds, straw, sawdust, or recycled paper, each substrate offers something special to your mushrooms. Let’s break down these options to help you make an informed decision.
Coffee Grounds
Coffee grounds are a fantastic choice for growing oyster mushrooms. They’re rich in nitrogen, which is a feast for your fungi. Plus, they’re readily available and often free – just ask your local coffee shop for their spent grounds. Coffee grounds also have a fine texture that mushrooms can easily colonize, and their natural acidity can help ward off competitor molds.
Straw
Straw is another excellent substrate for oyster mushrooms. It’s cheap, abundant, and mimics the natural environment where these mushrooms thrive. Before use, the straw needs to be pasteurized to kill off any unwanted organisms. This can be done by soaking it in hot water. Straw provides a sturdy structure for mushrooms to grow on and retains moisture well.
Hardwood Sawdust
Hardwood sawdust is a classic choice for mushroom cultivation. Oyster mushrooms prefer the complex lignins in hardwood, which they break down during growth. Ensure the sawdust is from untreated wood to avoid chemicals. It’s also a byproduct of the lumber industry, making it a sustainable option that helps in waste reduction.
Recycled Paper Products
Recycled paper products are an innovative and eco-friendly substrate for oyster mushrooms. They are usually free and easy to come by. Just like with straw, you’ll need to pasteurize the paper to prepare it for inoculation. This substrate is not only sustainable but also helps in diverting waste from landfills, contributing to a healthier planet.
Each substrate has its own set of instructions for preparation, but the underlying principle is the same: create a nurturing environment for your mushrooms to grow. By choosing the right organic substrate, you’re setting the stage for a successful and sustainable harvest.
Preparation of the Organic Substrate
Once you’ve chosen your organic substrate, it’s time to get it ready for your mushrooms. This preparation is crucial, as it will determine the success of your mushroom cultivation. It involves two main steps: sterilization to eliminate potential contaminants, and enhancing the nutrient content to support mushroom growth.
Sterilization: Guarding Against Contaminants
Sterilization is the process of making your substrate inhospitable to any unwanted bacteria, pests, or molds that could outcompete your mushrooms. While some substrates like straw and paper require pasteurization, which involves soaking in hot water, others might need full sterilization. This can be done by steaming or baking the substrate. It’s essential to follow this step carefully, as it lays the groundwork for a clean and productive grow.
-
Steam your substrate for 90 minutes at 160-180°F (71-82°C) to kill off unwanted organisms.
-
If you’re using an oven, spread your substrate on a tray and bake it at 200°F (93°C) for at least 1 hour.
-
After sterilization, let the substrate cool completely before inoculating with spawn.
-
Always work in a clean area to prevent recontamination of your substrate.
-
Consider using gloves and a face mask to maintain the sterility of your substrate.
Enhancing Nutrient Content
While many organic substrates are naturally rich in nutrients, you can give your mushrooms an extra boost by enhancing the substrate. This can be done by adding organic supplements like wheat bran, which is high in nitrogen, or gypsum, which provides calcium and sulfur. These additions can increase yields and improve the overall health of your mushrooms.
-
Mix in 5-10% of wheat bran or other supplements to your substrate to increase nutrient content.
-
Be careful not to over-supplement, as this can lead to excessive bacterial growth.
-
Gypsum can help prevent the substrate from clumping, ensuring better aeration and moisture retention.
-
Thoroughly mix your supplements into the substrate to ensure even distribution.
Starting Your Mushroom Growth
With your substrate prepared, it’s time to introduce the key ingredient that will transform it into a thriving mushroom garden: the spawn. This is essentially the seed of your mushroom crop, consisting of mycelium that will colonize the substrate and eventually fruit into mushrooms.
Spawn Selection: Picking the Right ‘Seeds’
Selecting the right spawn is like choosing the best seeds for your garden. You want spawn that is vigorous, pure, and suited to your chosen substrate. There are different types of spawn, such as grain spawn, sawdust spawn, and plug spawn, each with its advantages. Grain spawn is easy to distribute evenly, while sawdust spawn is better suited for wood-based substrates.
-
Choose a spawn supplier with a reputation for quality and purity to ensure the best start for your mushrooms.
-
Match your spawn type to your substrate for optimal colonization.
-
Consider the variety of oyster mushroom you want to grow, as some may perform better on certain substrates.
-
Make sure the spawn is fresh and stored properly before use.
Inoculation: Introducing Mushrooms to the Substrate
Inoculation is the process of mixing your spawn with the prepared substrate. It’s a critical step that requires care and attention to detail. You want to distribute the spawn evenly throughout the substrate to ensure a uniform grow. Once inoculated, the substrate should be kept at the right temperature and humidity for the mycelium to colonize it fully.
-
Use clean hands or tools to mix the spawn and substrate thoroughly.
-
Maintain a temperature of 70-75°F (21-24°C) for optimal mycelium growth.
-
Keep the inoculated substrate in a dark place until you see full colonization, which usually takes 10-14 days.
-
Avoid disturbing the substrate during colonization to prevent damage to the mycelium.
Maintaining Your Mushroom Cultivation
After inoculation, your role shifts to caretaker, ensuring the developing mycelium has everything it needs to thrive. This involves monitoring temperature, humidity, and air exchange, as well as being vigilant for any signs of contamination or pests. It’s a delicate balance, but with attention and care, you’ll be rewarded with a flush of fresh oyster mushrooms.
-
Keep the humidity high, around 90-95%, to encourage mushroom pinning.
-
Provide fresh air exchange to prevent CO2 buildup, which can hinder mushroom growth.
-
Monitor for any unusual colors or smells that might indicate contamination.
-
Be patient – mushrooms grow on their own schedule, and rushing the process can lead to problems.
Optimal Conditions for Growth
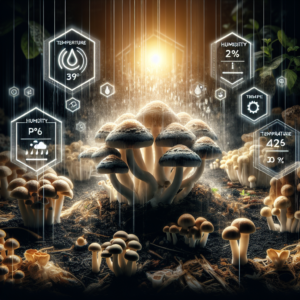
Creating the perfect environment for your oyster mushrooms to flourish is like setting the stage for a grand performance. It’s all about the right balance of humidity, temperature, and light. Aim for a humidity level of 90-95% to keep your mushrooms happy, and maintain a steady temperature between 55-65°F (13-18°C) for optimal growth. While oyster mushrooms don’t require much light, a few hours of indirect sunlight or fluorescent light will help them develop fully.
-
Use a hygrometer to monitor humidity levels in your growing area.
-
Consider using a humidifier or misting system to maintain high humidity.
-
Keep the growing area insulated to stabilize temperatures.
-
Provide a gentle breeze with a fan to simulate natural air flow and prevent CO2 buildup.
-
Remember, mushrooms are sensitive to their environment, so avoid drastic changes.
Monitoring and Troubleshooting
As with any form of cultivation, staying vigilant is key. Keep an eye out for any changes in your mushrooms or their substrate. If you notice any off-colors or smells, you may be dealing with contamination. Pests like fungus gnats can also be a nuisance. To troubleshoot, remove any affected areas immediately to prevent spread, and consider introducing beneficial insects or organic pest control methods if necessary.
-
Regularly inspect your mushrooms and substrate for signs of mold or pests.
-
Use sticky traps to catch and monitor fungus gnats.
-
Improve air circulation if you notice a buildup of condensation, which can lead to mold.
-
Adjust your watering schedule if the substrate seems too wet or too dry.
Harvesting and Post-Harvest Sustainability
Harvesting your oyster mushrooms is a rewarding experience, marking the culmination of your hard work. But the sustainability journey doesn’t end there. Post-harvest, it’s important to consider how to continue the cycle of growth and renewal. This includes how you handle the spent substrate and what you do with the mushrooms after they’ve been picked.
When and How to Harvest Oyster Mushrooms
Oyster mushrooms are ready to harvest when the edges of the caps start to turn upwards. To harvest, gently twist and pull the mushrooms from the substrate. It’s important not to wait too long, as over-mature mushrooms can become tough and less flavorful. Harvesting at the right time ensures the best quality and taste for your mushrooms.
-
Harvest in the morning when the mushrooms are most hydrated.
-
Use a sharp knife to cut clusters if they don’t twist off easily.
-
Handle mushrooms gently to avoid bruising.
-
Harvest regularly to encourage new growth.
Reusing and Recycling Spent Substrate
After harvesting, the spent substrate can still be valuable. It’s full of nutrients and can be used as a fantastic amendment to garden soil or compost. You can also experiment with using it to grow other types of mushrooms. By reusing and recycling the spent substrate, you’re contributing to a sustainable system that minimizes waste and enriches the environment.
-
Add spent substrate to compost piles to enhance decomposition.
-
Use it as a mulch in your garden to improve soil structure and fertility.
-
Consider donating it to local gardens or community projects.
-
Always ensure the substrate is free from disease before repurposing.
FAQs About Organic Oyster Mushroom Substrates
What is the Best Organic Substrate for Oyster Mushrooms?
The best organic substrate for oyster mushrooms is one that is readily available to you and suits your cultivation setup. Many growers find success with straw or hardwood sawdust, as they are easy to work with and mimic the mushrooms’ natural habitat. However, the ideal substrate can vary depending on your local climate, the specific mushroom strain, and your personal preferences. Experiment with different substrates to discover which yields the best results for you.
-
Straw is affordable and easy to find, making it a popular choice for many growers.
-
Hardwood sawdust provides the complex lignins that oyster mushrooms love.
-
Coffee grounds are a great option for small-scale or urban growers.
-
Recycled paper products are an eco-friendly choice that also helps reduce waste.
-
Always consider the availability and sustainability of the substrate materials you choose.
How Often Should I Water My Oyster Mushrooms?
Maintaining the perfect moisture level is crucial for your oyster mushrooms to thrive. You’ll want to water enough to keep the substrate moist but not so much that it becomes waterlogged. A good rule of thumb is to mist your mushrooms two to three times a day. This will keep the humidity just right and encourage healthy growth. Pay attention to the color and texture of your mushrooms as they’ll let you know if they need more or less water.
-
Mist your mushrooms in the morning, afternoon, and evening to maintain moisture.
-
If the edges of the mushrooms look dry, increase the frequency of misting.
-
Adjust your watering schedule based on the humidity and temperature of your growing area.
-
Use a spray bottle to gently mist the mushrooms rather than pouring water directly onto them.
-
Always use clean, chlorine-free water to avoid introducing contaminants.
Can I Reuse an Organic Mushroom Substrate?
After harvesting your oyster mushrooms, the substrate may seem spent, but it still holds value. You can indeed reuse it, though the nutrient content will be lower than before. It’s perfect for a second flush of mushrooms or as a nutritious addition to your compost pile. If reusing for mushroom cultivation, consider adding a bit of fresh substrate to boost nutrient levels. Remember, reusing substrate is a practice in sustainability and resourcefulness.
-
Check the substrate for any signs of disease before reusing it.
-
Add fresh organic material to rejuvenate the nutrient content for another mushroom crop.
-
Use the spent substrate as a compost accelerator for your garden.
-
Spread it around plants as mulch to enhance soil health.
-
Always pasteurize the substrate if you’re starting a new mushroom batch to eliminate any potential contaminants.
How Long Does It Take for Oyster Mushrooms to Grow?
The growth cycle of oyster mushrooms is surprisingly quick. From the moment you inoculate your substrate with spawn, you could see mushrooms in as little as three to four weeks. The exact timing can vary based on the conditions you provide and the specific strain of mushroom. It’s a fast turnaround, so stay observant and be ready to harvest when the mushrooms are at their peak.
-
Expect to see mushroom pins, the start of fruiting bodies, within 10-14 days after inoculation.
-
Full-sized mushrooms typically appear within 5-7 days after pinning starts.
-
Environmental factors like temperature and humidity play a significant role in growth rates.
-
Keep conditions consistent to avoid delays in mushroom development.
-
Harvest promptly to encourage subsequent fruiting cycles.
Do Organic Substrates Produce Better Tasting Mushrooms?
Many growers and chefs believe that mushrooms grown on organic substrates do have a superior flavor. The clean, chemical-free environment allows the mushrooms’ natural taste to shine through. Additionally, the diverse microorganisms present in organic substrates can contribute to a more complex flavor profile. While taste is subjective, there’s a consensus that organic oyster mushrooms are simply delicious.
-
Organic substrates can enhance the natural umami flavor of oyster mushrooms.
-
Chemical-free growing conditions are believed to produce a purer, more robust taste.
-
The variety of nutrients in organic substrates may contribute to a richer flavor.
-
Many consumers prefer the taste of organically grown produce, including mushrooms.
-
Ultimately, the best way to determine the taste difference is to try it yourself!
As we wrap up this comprehensive guide to organic oyster mushroom substrates, let’s remember the core message: growing mushrooms organically is a step towards a more sustainable and healthier world. It’s an act of care for our environment and a commitment to the natural balance of our ecosystems. By choosing organic substrates, you’re not only cultivating delicious fungi but also nurturing the soil and supporting biodiversity.
Whether you’re a seasoned grower or a curious beginner, the world of organic oyster mushroom cultivation is rich with possibilities. Experiment with different substrates, learn from each growing cycle, and share your experiences with the community. Together, we can make a difference, one mushroom at a time.
Happy mushroom growing!