
Embarking on the journey of growing oyster mushrooms at home is not only a fascinating endeavor but also an opportunity to cultivate a delectable gourmet ingredient right from the comfort of your own space. Whether you’re a budding mycologist or simply a food enthusiast, the process of nurturing these fungi from spawn to harvest is both educational and rewarding. Let’s dive into the essential steps and tips to ensure your oyster mushroom cultivation is a success.
Key Takeaways
-
Oyster mushrooms require specific conditions, such as temperature and humidity, for optimal growth.
-
Preparing the substrate correctly is crucial for the mycelium to thrive and eventually produce mushrooms.
-
The timeline from inoculation to harvest is typically between 3 to 6 weeks.
-
Recognizing the right time to harvest will maximize your yield and flavor of the mushrooms.
-
After harvesting, proper care of the substrate can lead to multiple flushes of mushrooms.
Start Your Oyster Mushroom Adventure
Before we delve into the technicalities, let’s clarify why oyster mushrooms are an excellent choice for home cultivation. These fungi are not only delicious but also packed with nutrients. They grow relatively quickly and are less susceptible to pests and diseases compared to other mushroom varieties. Moreover, oyster mushrooms can be grown on a variety of substrates, many of which are waste products, making this a sustainable and eco-friendly project.
Why Grow Oyster Mushrooms?
Oyster mushrooms are a versatile culinary delight, known for their delicate texture and subtle flavors. They are rich in protein, fiber, vitamins, and minerals, making them a nutritious addition to any diet. But beyond their health benefits, growing oyster mushrooms at home can be a fun and engaging way to connect with nature and enjoy the fruits of your labor.
What You’ll Need to Begin
To start your mushroom-growing journey, you’ll need a few basic supplies:
-
Oyster mushroom spawn – the ‘seed’ of your mushrooms
-
A substrate – this is the material the mushrooms will grow on, such as straw or coffee grounds
-
Containers or bags for housing the substrate and spawn
-
A spray bottle for misting
-
A space where you can control the temperature and humidity
Setting the Stage: Inoculation
Inoculation is the first critical step in your mushroom cultivation. This is where you introduce the oyster mushroom spawn to the substrate. Doing this correctly sets the foundation for a successful mushroom crop.
Choosing Your Spawn
Spawn acts as the lifeblood of your mushroom growing operation. It’s important to source high-quality spawn from a reputable supplier. There are various types of oyster mushrooms, and each may have specific growth requirements, so choose one that suits your environment and taste preferences.
Preparing the Substrate
The substrate is the food source for your mushrooms. It needs to be nutrient-rich and properly pasteurized to kill any unwanted bacteria or fungi. Common substrates include straw, sawdust, or agricultural byproducts. Here’s how to prepare it:
-
Chop or shred your substrate into small pieces to increase the surface area for mycelium growth.
-
Pasteurize the substrate by soaking it in hot water or using a steam treatment to eliminate competing organisms.
-
Drain and cool the substrate to the touch before inoculation.
Spawn to Substrate: Inoculation Process
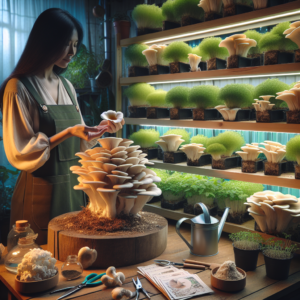
Mix the spawn with the cooled substrate in a clean environment to reduce the risk of contamination. Distribute the spawn evenly to ensure that the mycelium can colonize the substrate effectively. Seal the mixture in your chosen container or bag, making sure there are small holes for air exchange.
Creating Optimal Conditions for Mycelium Growth
Once your substrate is inoculated, it’s time to provide the perfect conditions for the mycelium to grow and eventually produce mushrooms.
Maintaining Temperature and Humidity
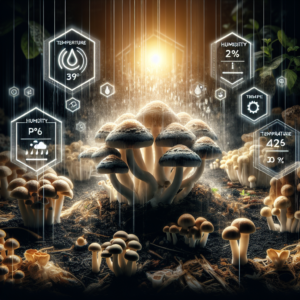
Oyster mushrooms thrive in a humid environment with temperatures ranging from 55 to 75 degrees Fahrenheit. You’ll want to maintain these conditions as consistently as possible. Use a thermometer and hygrometer to monitor your growing area, and mist regularly to keep the humidity up.
The Role of Darkness in Mycelium Development
During the initial colonization of the substrate, the mycelium prefers a dark environment. This means keeping your inoculated substrate out of direct sunlight. A cupboard, closet, or a shaded corner of a room can work well. After colonization, when you see the first signs of mushroom pins, introducing indirect light can encourage the mushrooms to grow.
Remember, the key to successful mushroom cultivation is patience and attention to detail. By following these steps and maintaining the right conditions, you’ll be well on your way to harvesting your very own homegrown oyster mushrooms. Stay tuned for more in-depth guidance on each stage of the oyster mushroom growth timeline.
The Visible Change: From Mycelium to Mushrooms
As the days pass and you’ve meticulously maintained the right conditions for your oyster mushrooms, you’ll witness an exciting transition. The mycelium, which at first seemed like a white, thread-like web, will start to form tiny bumps on the surface of the substrate. These are the primordia, commonly known as pins, and they are the baby mushrooms about to embark on their growth spurt.
Spotting the First Pins
Spotting the first pins is a milestone in the growth timeline of oyster mushrooms. These small formations are a sign that your substrate is fully colonized and the conditions are right for fruiting. Pins can appear as early as 3 weeks after inoculation, but this can vary depending on the strain and environment. It’s a moment of joy for any grower, signaling the beginning of the fruiting phase.
Caring for Developing Oyster Mushrooms
As the pins develop into baby mushrooms, your role shifts to ensuring their continued health and growth. This means paying close attention to humidity and airflow. Mushrooms are over 90% water, so they need a lot of moisture to grow. Mist the mushrooms with water daily, but be careful not to overdo it – you want to avoid soaking the substrate. Proper airflow is also critical to prevent the buildup of carbon dioxide, which can stifle growth and lead to abnormal mushroom shapes.
Keep an eye out for any signs of contamination or drying out, which can hinder your crop. If you notice any off-colors or foul smells, it may indicate a problem. On the other hand, if the substrate looks dry, step up your misting routine or consider covering the growing area with a humidity tent to lock in moisture.
Harvest Time: Picking Your Oyster Mushroom Bounty
After nurturing your mushrooms through the pinning stage, the caps will start to unfurl. This is a clear sign that harvest time is near. Oyster mushrooms typically reach maturity within 5 to 7 days after the pins form. They grow rapidly, often doubling in size each day, so keep a close eye on them.
Harvesting at the right time is crucial for the texture and flavor of your mushrooms. If you wait too long, the caps will fully open and the mushrooms may become tough. Harvest while the edges of the caps are still slightly curled downward for the best culinary experience.
When it’s time to harvest, gently twist and pull the mushrooms from the substrate. It’s best to harvest all the mature mushrooms at once to encourage a second flush of growth. After harvesting, don’t discard the substrate – it still has the potential to produce more mushrooms!
Example: “I harvested my first batch of oyster mushrooms just four weeks after inoculation. The caps were tender, the flavor was earthy and mild, and they made a fantastic addition to my stir-fry. Remember, the fresher the harvest, the better the taste!”
How to Know When It’s Time to Harvest
You’ll know it’s time to harvest when the edges of the mushroom caps are still slightly curled under and the mushrooms have a firm, meaty texture. If the caps have flattened out completely and the mushrooms start to drop spores, which look like a fine dust, you’ve waited a bit too long. Consistently checking your mushrooms and being familiar with their growth patterns will help you nail the perfect harvest time.
Harvesting Techniques: From Substrate to Table
Harvesting oyster mushrooms is simple and satisfying. Use a clean, sharp knife or simply twist the mushrooms off at the base. Be gentle to avoid damaging the delicate fruiting bodies or the underlying mycelium. After harvesting, you can store your mushrooms in the refrigerator for up to a week, though they’re best enjoyed fresh.
Here’s a tip: leave a small stub of the mushroom stem behind. This minimizes damage to the mycelium and substrate, promoting the chances of a second flush of mushrooms. Plus, it keeps the substrate tidier, reducing the risk of contamination.
The Growth Cycle Continues: Post-Harvest Care
With the first harvest complete, your job isn’t over yet. The substrate and mycelium still have plenty of energy for additional flushes. To encourage a second flush, continue to maintain the right conditions, just as you did for the first. If the substrate has dried out during the first fruiting, you may need to mist more frequently or soak the substrate to rehydrate it.
Post Harvest Substrate Care
After harvesting, give the substrate a break for a few days to recover. This rest period is a natural part of the mushroom’s growth cycle. During this time, you might notice the mycelium repairing itself and re-colonizing any areas disturbed during the harvest. Keep maintaining the temperature and humidity, and soon enough, you’ll see new pins starting to form.
Second Flush Success: Encouraging Continued Growth
Many growers find that the second flush of oyster mushrooms can be even more prolific than the first. To encourage a successful second flush, make sure the substrate is still moist and nutrient-rich. If the substrate seems depleted, you can add a thin layer of fresh, pasteurized substrate on top to give the mycelium a new food source.
With proper care, your oyster mushroom project can yield multiple flushes, extending your harvest and increasing your return on investment. Remember, the joy of mushroom cultivation is in the process as much as it is in the harvest. Enjoy every step, and don’t hesitate to experiment and learn from each cycle.
Stay tuned for the final part of our guide, where we’ll cover frequently asked questions and provide additional tips to ensure your oyster mushroom growing experience is top-notch. Happy mushrooming!
Post Harvest Substrate Care
Once the excitement of the initial harvest has passed, it’s important to turn your attention back to the substrate. Your mushrooms may be gone for now, but the substrate they’ve left behind is still full of potential. To make the most of it, let the substrate rest for a few days. This gives the mycelium time to recuperate and prepare for the next flush of mushrooms. Keep the substrate moist and maintain the appropriate temperature and humidity levels, as these conditions are still crucial for growth.
Second Flush Success: Encouraging Continued Growth
With proper care, your substrate can produce several flushes of oyster mushrooms. Often, the second flush can be even more abundant than the first. To encourage continuous production, keep the environment stable and watch for the mycelium to rebound. If the substrate seems spent, adding a fresh layer of pasteurized substrate can provide the necessary nutrients for another round of growth. Monitor the substrate closely, and with a little patience, you’ll be rewarded with a new crop of oyster mushrooms.
FAQs
Now that we’ve explored the oyster mushroom growth timeline, let’s address some frequently asked questions to further enhance your understanding and success in growing these delightful fungi.
How long does it take for oyster mushrooms to grow?
From inoculation to harvest, oyster mushrooms typically take between 3 to 6 weeks to grow, depending on the environmental conditions and the specific mushroom strain. The first signs of growth, or pinning, can occur as soon as 3 weeks after inoculation, with mushrooms ready to harvest about a week after pins first appear.
Can oyster mushrooms be grown at home?
Yes, oyster mushrooms are well-suited for home cultivation. They require minimal space and can grow on various substrates, making them ideal for beginners. With the right conditions, anyone can grow oyster mushrooms at home and enjoy fresh, homegrown produce.
What is the best substrate for oyster mushrooms?
Oyster mushrooms are not picky and can grow on a variety of substrates. Some of the most common and effective substrates include:
-
Straw
-
Sawdust
-
Coffee grounds
-
Paper products
-
Agricultural waste like sugarcane bagasse
Each substrate has its own preparation requirements, but generally, they need to be pasteurized or sterilized before use to ensure the best yield.
How do you prevent mold growth on oyster mushrooms?
Mold can be a common issue in mushroom cultivation, but it can be prevented by:
-
Maintaining a clean growing environment
-
Pasteurizing or sterilizing the substrate properly
-
Ensuring good airflow to prevent excess humidity and condensation
-
Monitoring and adjusting the temperature as needed
Keeping a close eye on your mushrooms and substrate will allow you to catch any signs of mold early and address them before they become a problem.
Can oyster mushroom substrates be reused?
After harvesting your mushrooms, the substrate can often be reused for additional flushes. The mycelium will continue to consume the available nutrients, and as long as the conditions remain favorable, it can produce multiple crops. Once the substrate is fully spent and no longer producing, it can be composted or used as a soil amendment, making the process zero-waste and environmentally friendly.
In conclusion, growing oyster mushrooms at home is a rewarding and sustainable way to produce your own food. By understanding the growth timeline and maintaining the right conditions, you can enjoy multiple harvests from a single inoculation. Remember, the key to success is patience, observation, and a little bit of love for the fungi you’re cultivating. Happy growing!