
Ever thought about growing your own food right in the heart of the city? Well, mushrooms are the perfect crop for urban farming. They’re not just delicious; they’re also a symbol of sustainability and self-sufficiency. Imagine transforming a small space in your apartment, garage, or even a closet into a thriving mushroom grow room. It’s possible, and I’m here to guide you through every step of designing your urban oyster farm for success.
Key Takeaways
-
Mushrooms are ideal for urban farming due to their small space requirements and high yield potential.
-
Creating the right environment with controlled climate and lighting is crucial for mushroom growth.
-
Choosing the correct mushroom strains and understanding their specific needs is essential.
-
Regular maintenance and careful harvesting will ensure a bountiful mushroom crop.
-
Urban mushroom farming can be a viable business, connecting you with local food markets and restaurants.
Unlock the Magic of Mushrooms: Your Urban Grow Room Awaits
Mushrooms are magical, not just in fairy tales but in urban farming too. They grow quickly, require minimal space, and can be cultivated all year round. Most importantly, they’re a high-value crop that can turn a tidy profit or simply spice up your homemade dishes. So, let’s roll up our sleeves and get started on your mushroom grow room setup.
Crafting the Perfect Environment
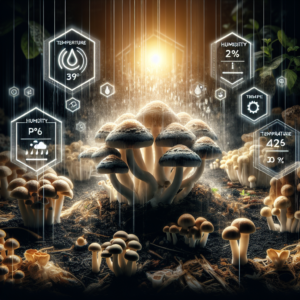
First things first, mushrooms aren’t too picky, but they do need a special kind of place to call home. You need to create an environment that mimics their natural habitat – think damp, dark, and cool. A spare room, basement, or even a closet can work wonders if you set it up right. The key is to control the temperature, humidity, and air circulation. You’ll want to aim for a temperature range of 55-60°F (13-16°C) and a humidity level of around 90-95% for most mushroom varieties.
Choosing the Right Strains
Not all mushrooms are created equal when it comes to urban farming. Oyster mushrooms, for example, are a great choice for beginners. They’re resilient, grow rapidly, and aren’t as demanding as some other varieties. Plus, they taste amazing! But don’t stop there – explore other strains like Shiitake or Lion’s Mane to diversify your urban farm.
Maintaining Your Mushroom Oasis
Once you’ve got your grow room set up, maintenance is your next big task. Monitoring your crops, checking for pests, and making sure your mushrooms are happy and healthy will be part of your daily routine. It’s like having a pet – a very quiet, non-moving pet that rewards you with food.
Harvesting the Fruits of Your Labor
And then comes the best part – harvesting your mushrooms! With the right care, you can expect to see your first crop in just a few weeks. Pluck them gently, store them properly, and either sell them fresh to local food enthusiasts or cook up a storm in your kitchen.
The Heart of Your Urban Farm: Selecting the Ideal Location
The location of your mushroom grow room is like the foundation of a house – it needs to be right. You want a spot that’s out of direct sunlight, away from drafts, and somewhere with a stable temperature. Most importantly, it should be a place where you can control the environment without too much hassle. Think about spaces that are typically underutilized – under the stairs, a corner of the garage, or even a section of your laundry room could become mushroom heaven.
Space Efficiency in Urban Settings
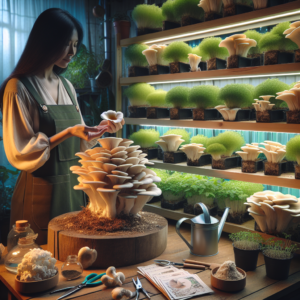
Urban spaces are often limited, but mushrooms don’t need much room to grow. A few square feet can yield an impressive harvest. Here’s the trick: go vertical. Use shelving to maximize your grow area without spreading out. This way, you can turn even the tiniest nook into a productive farm.
Remember, the size of your grow room will depend on how many mushrooms you want to produce. If you’re just starting out, a smaller setup might be more manageable. But if you’re aiming for a full-scale urban mushroom farm, you’ll need to think bigger. Either way, efficiency is your best friend in the urban jungle.
For example, a 30m2 space can produce up to 50kg of mushrooms per week if optimized well. That includes all three stages of the growing cycle: inoculation, incubation, and fruiting.
Controlling Climate and Light: Essentials for Mushroom Growth
Mushrooms are quite the Goldilocks when it comes to their growing conditions – everything has to be just right. They thrive in cooler temperatures, so if your space gets warm, you might need to invest in a cooling system. Insulation can also help maintain the right temperature.
As for light, mushrooms don’t need much. A little indirect sunlight or even artificial light for a few hours a day will suffice. But remember, we’re not trying to grow a sunflower here; mushrooms are all about subtlety in their needs.
Humidity is where things get a bit more technical. You might need a humidifier to keep the air moist, and a hygrometer to measure the humidity levels. This is crucial because too little humidity and your mushrooms won’t grow; too much and you could end up with mold.
Let’s take a break here, but stay tuned. In the next section, we’ll dive into the nuts and bolts of setting up your mushroom grow room with all the essential equipment and materials you’ll need to start growing. We’re on the way to transforming that underused space into a productive urban farm that not only feeds you but also has the potential to feed your community.
Substrates and Containers: Choosing the Best for Your Mushrooms
Think of substrates as the soil for your mushrooms; it’s where they’ll draw their nutrients from. But unlike typical garden soil, mushroom substrates need to be rich in organic matter. Some common choices are straw, wood chips, or sawdust, often supplemented with organic materials like coffee grounds or manure. Now, for containers, you can use anything from plastic bags to buckets, or even specially designed mushroom grow kits. The key is to ensure they are clean and can hold the substrate while allowing for some airflow.
Climate Control: Temperature and Humidity Solutions
Getting the temperature and humidity right is like setting the stage for a grand performance – your mushrooms are the stars. A simple space heater or an air conditioner can help you manage the temperature. And for humidity, a humidifier is your best friend. You can use a simple spray bottle in the beginning, but as you scale up, you’ll want something that can maintain the moisture levels without constant attention.
Lighting the Way: Understanding Mushroom Illumination Needs
Mushrooms don’t photosynthesize like plants, so their lighting needs are minimal. A few hours of indirect sunlight or fluorescent lighting per day is enough. But here’s a pro tip: use a timer for your lights. It’ll help mimic the natural day-night cycle, which encourages healthy mushroom growth without you having to remember to switch the lights on and off.
Let’s Get Growing: The Mushroom Cultivation Process
The cultivation process is where the magic happens. It’s a journey from spore to harvest, and every step is crucial. Patience, care, and attention to detail are your best tools here. Let’s break it down into stages and get your urban mushroom farm off the ground.
From Spore to Sprout: Preparing Your Substrate
Before you can plant your mushroom ‘seeds’, which are actually called spores, you need to prepare your substrate. It’s not just about choosing the right material; you also need to pasteurize or sterilize it to kill any unwanted bacteria or fungi. This can be done through methods like hot water baths or steam treatment. Once your substrate is ready, it’s time to introduce the spores and let nature do its thing.
Inoculation: Planting the Seeds of Tomorrow
Inoculation is the process of adding mushroom spores or spawn to your substrate. You can think of spawn as the mushroom equivalent of plant seedlings. Be extra careful during this step to maintain a sterile environment – any contamination can spoil your crop before it even begins. Once your spawn is mixed with the substrate, it’s time for the next stage: incubation.
During incubation, your spawn will colonize the substrate. This means the mycelium, which is the root system of your mushrooms, will start to spread throughout the material. This part of the process requires darkness and stable temperatures. It’s a bit like waiting for dough to rise – you won’t see much at first, but give it time, and you’ll have a substrate that’s ready to fruit.
-
Prepare and pasteurize your substrate to create a nutrient-rich base.
-
Inoculate the substrate with mushroom spawn, ensuring a sterile environment.
-
Incubate your inoculated substrate in a dark place with stable temperatures.
Fruiting: Where Mushrooms Come to Life
Once your mycelium has fully colonized the substrate, it’s time for fruiting – the stage where actual mushrooms start to form. This is when you introduce your substrate to conditions that mimic the natural environment where mushrooms thrive. You’ll need fresh air, a bit more light, and a drop in humidity. With the right conditions, you’ll soon see the fruits of your labor: tiny mushroom pins that will grow into harvestable mushrooms.
Scaling Up: Expanding Your Urban Mushroom Empire
As you get the hang of mushroom cultivation, you might think about scaling up. More mushrooms mean more to eat, share, or sell. To maximize your yield, you’ll want to optimize every inch of your space and streamline your process. This could mean investing in larger or more efficient equipment, expanding your grow area, or even automating some of the environmental controls.
Maximizing Yield in a Limited Space
Maximizing yield in a small space is all about efficiency and creativity. Think vertical farming, stacking your growing trays or shelves to use the full height of your space. Also, consider the flow of your workspace to minimize time and effort. Every second saved is time you can spend nurturing your crops or planning your next urban farming venture.
Smart Harvesting Techniques for Increased Production
Harvesting your mushrooms at the right time is crucial. Too early and they won’t have reached their full size; too late and they may begin to degrade. Use a sharp knife or scissors to cut them at the base, being careful not to damage the mycelium, as it will produce more mushrooms. With a steady hand and a keen eye, you’ll keep your production high and your mushrooms happy.
After the harvest, don’t just sit back and admire your work. It’s time to prepare for the next batch. Clean your containers, pasteurize new substrate, and get ready to inoculate again. The cycle of urban mushroom farming is a beautiful, ongoing process that rewards the diligent farmer.
For instance, one urban farmer managed to turn a disused corner of their apartment into a mini mushroom farm, producing several pounds of oysters each week. They sold their surplus at a local farmer’s market, creating a small but steady income stream.
Cultivation Capers: Troubleshooting Common Mushroom Grow Room Issues
Even the best-laid plans can encounter snags, especially in mushroom farming. Contamination, improper humidity, and temperature fluctuations are just a few of the challenges you might face. But don’t worry, with a little know-how, you can overcome these obstacles and keep your urban farm thriving.
Contamination is the bane of mushroom growers everywhere. It can come from anywhere – the air, your hands, even the substrate itself. The key to prevention is cleanliness. Sterilize your tools, wash your hands, and consider using a face mask when working with your mushrooms. If contamination does occur, it’s essential to remove the affected area immediately to prevent it from spreading.
Temperature and humidity issues can be tricky, but they’re not insurmountable. Use a thermometer and hygrometer to keep a close eye on your grow room conditions. If things start to drift, adjust your heaters, coolers, or humidifiers accordingly. Remember, consistency is king in the world of mushroom cultivation.
Lastly, stunted growth can be a sign of poor nutrition or inadequate environmental conditions. Make sure your substrate is nutrient-rich and that you’re maintaining the proper temperature and humidity. Sometimes, a small tweak is all it takes to turn things around.
Urban mushroom farming is an adventure that can fill your life with delicious, homegrown food and even provide a source of income. It’s a journey of learning, growth, and connection to the natural world – right in the heart of the city. So why wait? Start your mushroom grow room today, and join the urban farming revolution!
As you watch your mushrooms grow and thrive, it’s important to start thinking about what comes next. Harvesting is just the beginning of the next phase in your urban mushroom farming journey. Proper post-growth care and distribution are crucial for keeping your mushrooms fresh and getting them into the hands of eager customers or onto your own plate.
Reaping the Harvest: Post-Growth Care and Distribution
When your mushrooms are ready to harvest, it’s a moment of true satisfaction. But the work doesn’t stop there. Post-harvest, you need to handle your mushrooms with care to maintain their quality and extend their shelf life. This means harvesting them at the right time, usually when the caps are still slightly curled under, and handling them gently to avoid bruising.
Once harvested, it’s all about keeping them fresh. Mushrooms have a high water content and can spoil quickly if not stored properly. The key is to find the sweet spot in temperature and humidity that will keep them in prime condition until they reach the end consumer.
Now, let’s talk about getting those mushrooms out into the world. Whether you’re selling them at a local farmers market, supplying restaurants, or simply sharing with friends and family, you’ll need to consider the best way to transport and present your mushrooms to maintain their quality and appeal.
Storing Your Bounty: Keeping Mushrooms Fresh
Proper storage is essential for keeping your mushrooms fresh. They’re best kept in a cool, dark place with good air circulation. A refrigerator is usually the go-to, but make sure they’re not packed too tightly, as they need to breathe. A paper bag can be a better choice than plastic, as it absorbs excess moisture and keeps the mushrooms dry.
-
Harvest mushrooms when the caps are slightly curled under.
-
Handle mushrooms gently to prevent bruising.
-
Store in a cool, dark place with good air circulation, ideally in a paper bag.
Storing your mushrooms correctly can make a significant difference in their shelf life and taste. Freshness is a major selling point, especially when dealing with local food markets, where quality often trumps quantity.
And remember, if you’re planning to sell your mushrooms, regulations and food safety standards must be adhered to. This will ensure not only the quality of your product but also the trust of your customers.
From Farm to Table: Connecting with Local Markets and Restaurants
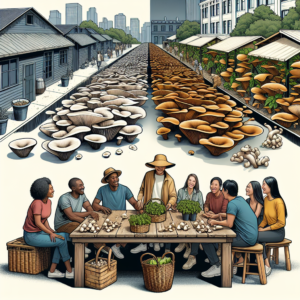
Once you’ve harvested and stored your mushrooms, the next step is distribution. If you’re selling them, it’s essential to build relationships with local markets and restaurants. Chefs love fresh, locally sourced ingredients, and mushrooms can be a standout item on their menu. Farmers markets are another excellent avenue for selling your produce, as consumers are increasingly interested in supporting local farmers and sustainable food systems.
When approaching potential buyers, it’s important to highlight the unique qualities of your mushrooms. Emphasize their freshness, the sustainable methods used to grow them, and the local aspect of your urban farm. These are all selling points that can set your product apart from the competition.
FAQ
What are the best mushroom varieties for urban farming?
The best mushroom varieties for urban farming are those that require minimal space and yield high returns. Oyster mushrooms are a top choice due to their fast growth, resilience, and adaptability to various substrates. Shiitake mushrooms are also popular for their rich flavor and medicinal properties. Lion’s Mane is another variety gaining attention for its unique appearance and health benefits.
How often should I check and maintain my grow room conditions?
You should check and maintain your grow room conditions daily. Mushrooms are sensitive to their environment, and small changes can have a big impact on their growth. Regular monitoring of temperature, humidity, and air quality will help you catch any issues early and keep your mushrooms thriving.
Can mushroom farming be a viable business in an urban environment?
Absolutely, mushroom farming can be a viable business in an urban environment. With the right setup and care, urban mushroom farms can produce high-quality crops with a relatively small footprint. The key is to find your niche, whether it’s supplying rare gourmet varieties to local restaurants or selling at farmers markets. With the growing interest in local and sustainable food, urban mushroom farming has a bright future.
What is the most cost-effective way to set up an urban mushroom grow room?
The most cost-effective way to set up an urban mushroom grow room is to start small and scale up as you learn. Use readily available materials and equipment, and focus on low-cost or free substrates like coffee grounds or straw. Minimize initial investments by DIY-ing your setup and gradually invest in more advanced equipment as your operation grows and becomes profitable.
What are the common challenges faced by urban mushroom growers?
Common challenges faced by urban mushroom growers include limited space, ensuring consistent growing conditions, and managing pests and diseases. Urban environments can also present unique challenges such as pollution and fluctuating temperatures. Overcoming these challenges often requires creativity, adaptability, and a commitment to maintaining a clean and controlled growing environment.